Flint62Smoothie
-
Posts
36 -
Joined
-
Last visited
Content Type
Profiles
Forums
Events
Store
Downloads
Gallery
Everything posted by Flint62Smoothie
-
My bad … POOR info on my part, mea culpa! I think someone STOLE or lost the original trigger and trigger guard, so someone else (maybe?) just added parts to make it look real and complete. The barrel is breeched like a typical Tanegashima is, with the long breech plug. … pictures later …
-
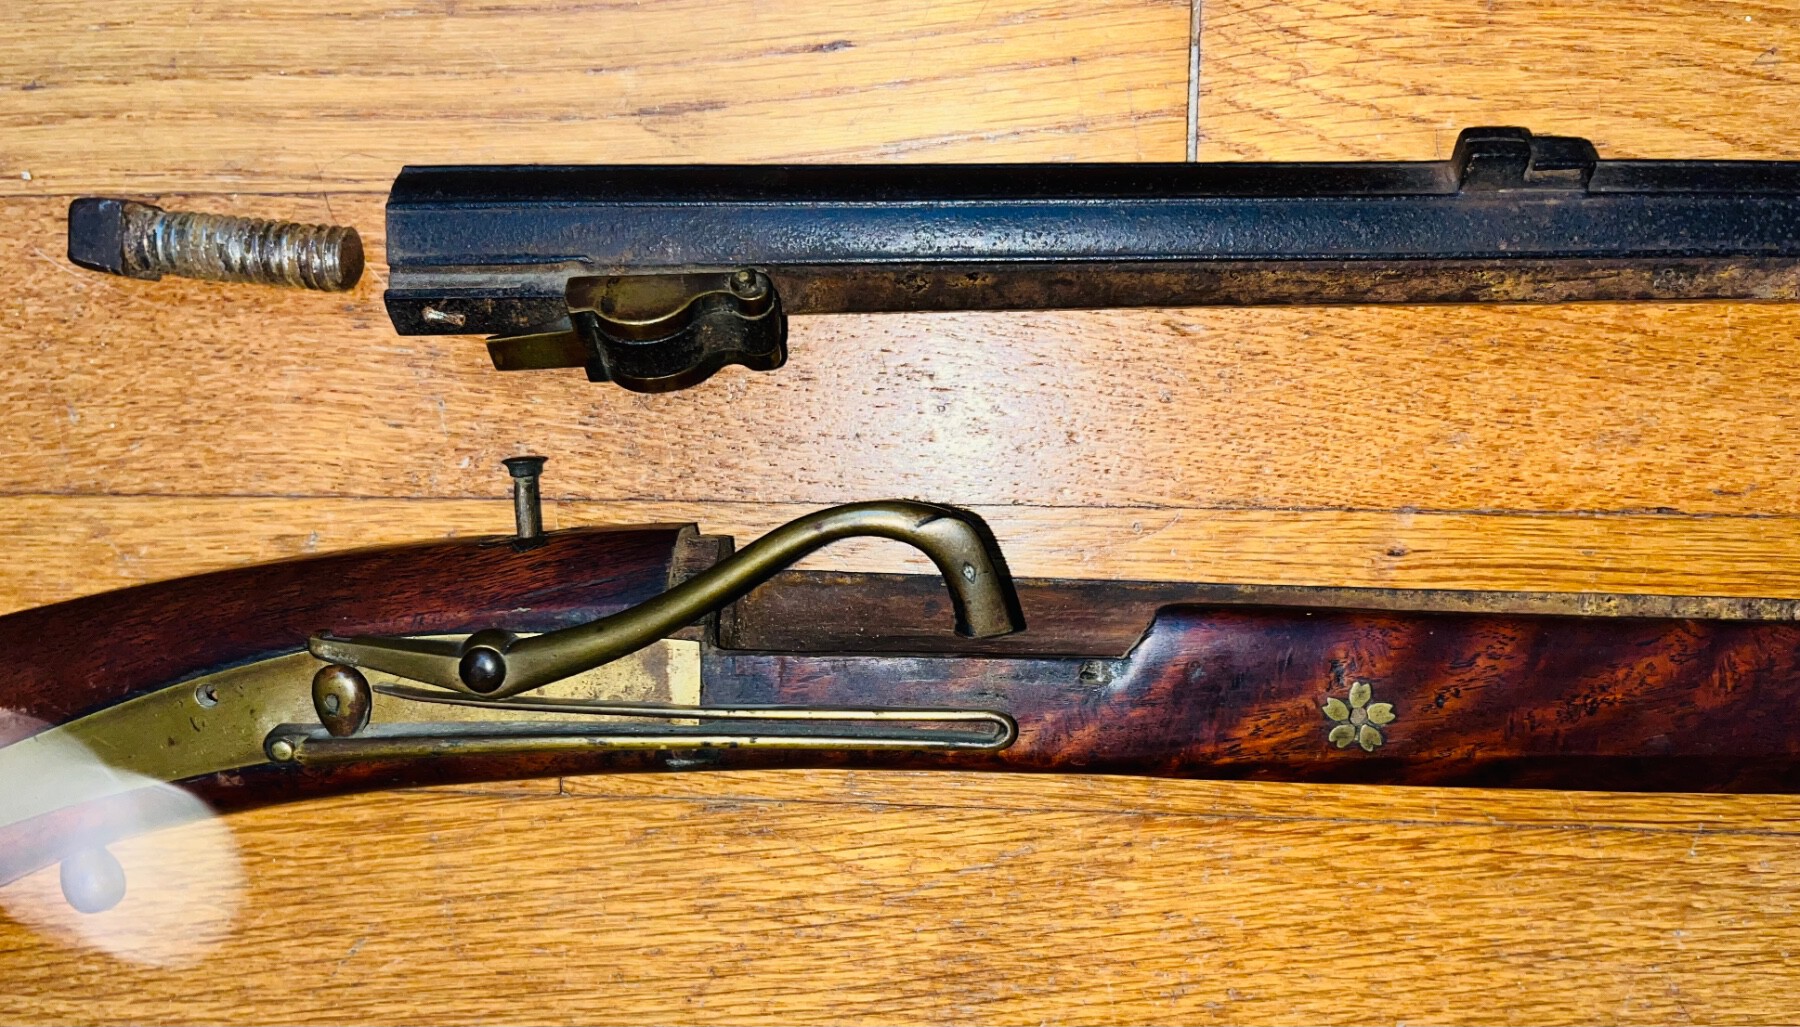
... Gents - It came in. Might be exactly what you suggest @Peter Bleed ! Any ideas how we'd move forward with the possibility that it was indeed a Japanese Trade Gun? Lock - The lock works and is complete and operable; it just needed a tear-down, clean up, oil and lube. And get this, there serpentine and main spring dimensions (from the hooked notch to the pin hole that holds the spring on) match perfectly to my Tanegashima that needs a serpentine. It has a modern recreation of a mainspring on it - that's functional, albeit made of steel - but I'd like it to wear a brass one. Trigger Guard - Fake, looks like a door pull from some cabinet hardware place. Trigger - Fake, saem as above, less I don't know what hardware looks like a real 'Tang' trigger, LOL! Stock - Real, someone may have cut it down is my best guess. Barrel - At one time it might have been shootable, but someone welded the pan fully full or closed off so as to make it unfireable. The barrel profiling looks like it was expressly made to be a short light, octagonal tapered barrel of 19" in length. Most interestingly it has a 'Western' type wide V-notch rear sight like early BP carbines wore. There are no markings anywhere. Are there any close-ups one would want to see? Well, I bought it for parts and to that end I've succeeded! What I will do it fire up my forge (when built, as I am retiring soon) and I will then make sutable replacement parts for my other Tanegashimas, using these parts as models, so I can return this one to its former 'Trade Gun' (hopefully!) status.
-
I will certainly check it for any markings once received ...
-
I found some parts I need! … just picked up the basstardized one for $200, where I’ll hopefully be able to use the serpentine & mainspring on my other Tanegashima.

-
Thanks @Bugyotsuji! The barrel length needs to be about 42" long and I'd like a cannon muzzle. So far I have checked 1 of the 2 other Tanegashima barrels that I have and one is close. It should be close enough that a custom barrel maker should be able to make a tapered octagonal barrel for it. I may see if Bobby Hoyt in PA (USA) would be up to it. Is there any barrel maker you would suggest? The breech width is about 1-3/16" and tapers to 7/8" at about just under 40" up, right at the end of the upper forend, so it would need to be at least a 42" octagonal barrel to allow for a large, flared 'cannon' muzzle. The lock works perfectly and it is only missing a barrel, along with the pan, brass pan guard and brass pan cover!
-
FYI, I am bidding on another 'parts gun' so I won't cannibalize this one, but will buy or make a barrel for it.
-
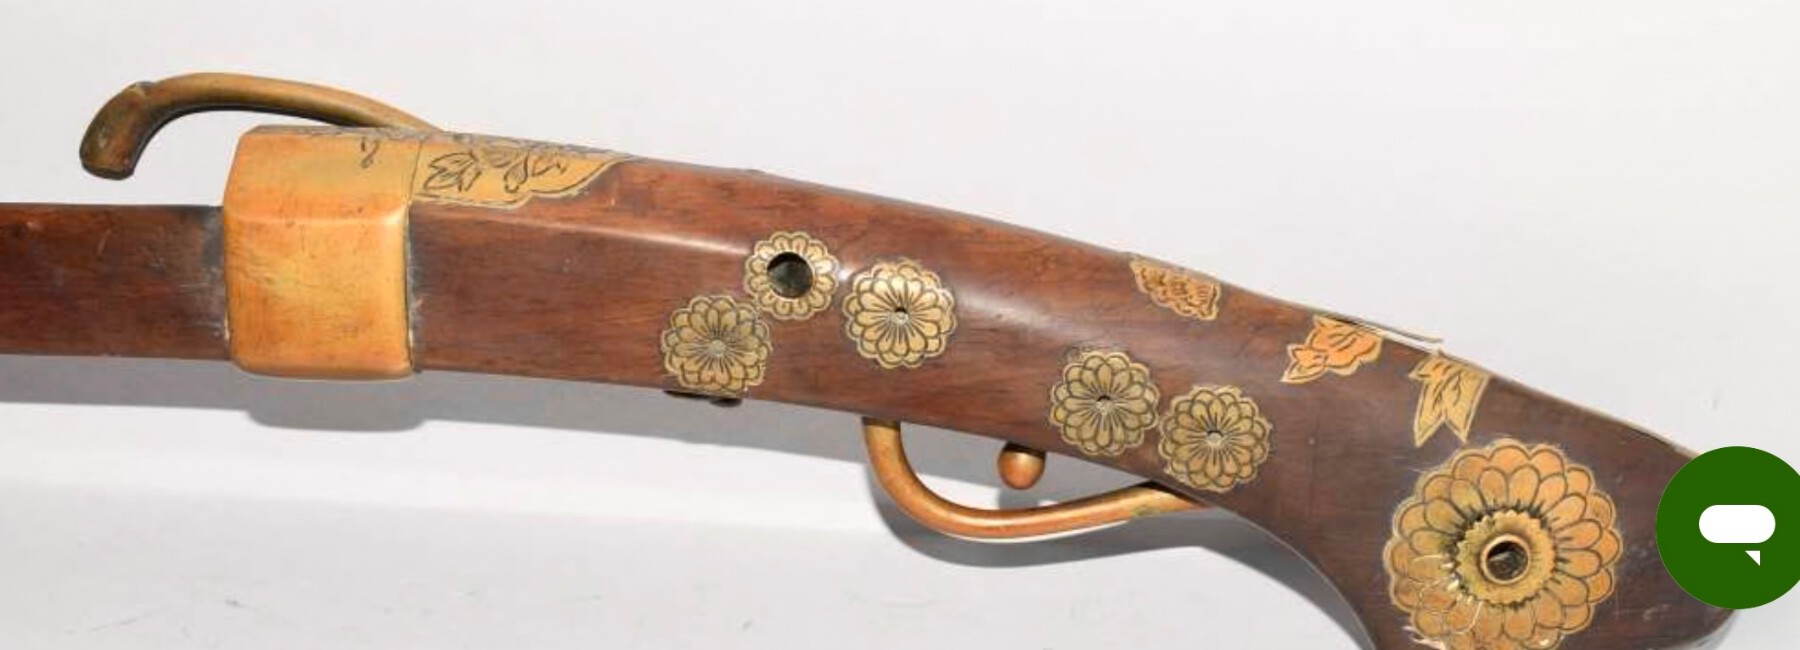
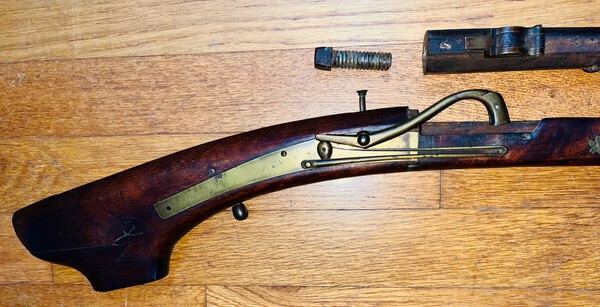
Many here may know I’ve been on the hunt for Tanegashima parts, whereas I have 2 other Tanegashimas in stages of restoration, where: -One needs a serpentine, brass mainspring (gun has a steel replacement spring) and pan guard. -The other, posted a few posts down, is shootable after a bore honing, and only needs a trigger guard. I just won this US auction, for only $195, complete less a barrel. I admit I bought it “as a parts gun”, but in reality it has superior inlays! Would it be kosher to ‘swap’ another barrel into it, if it fits? Or just cannibalize it … ? Which is really not the best option, I’d agree. To have a really nice shooter, maybe I’ll ask Bobby Hoyt in PA to make a custom tapered barrel with a cannon muzzle! I’d appreciate any/all input! Cheers!


-
New-to-me - interesting, but what is it?
Flint62Smoothie replied to Flint62Smoothie's topic in Tanegashima / Teppo / Hinawajū
Thanks all for the comments! Yes, this one apparently had a TG at some point, as the inlets are empty and pins are missing, but more so ... I can see a slight bit of wear where they once sat. My goal is to restore it to shooting condition. I'll probably send the barrel off to Bobby Hoyt in PA to be honed smooth. He does a remarkable job, if people haven't heard of him before. Off-topic ... yes, but he'll work on any BP barrel and has never had a threaded breech plug that he's not been able to successfully remove. He also will check the integrity of welded shut BPlugs. He even takes smaller bores and re-rifles them to whatever larger caliber the barrel steel will safely accomodate. Last time I had a smoothie barrel honed it was only $60 USD ... and it looked brand NEW! He also took a 62-cal smooth barrel and rifled it to be 62-cal rifled for my British Baker (think Sharpe's 95th Rifles) and that was only $100. -
New-to-me - interesting, but what is it?
Flint62Smoothie replied to Flint62Smoothie's topic in Tanegashima / Teppo / Hinawajū
… now to find OR FORGE a replacement trigger guard! -
New-to-me - interesting, but what is it?
Flint62Smoothie replied to Flint62Smoothie's topic in Tanegashima / Teppo / Hinawajū
Thanks! I’ll measure the bore later. I just thought the inletting looked ‘different’, what with the deep scores, but that just could the individual’s build method. -
New-to-me - interesting, but what is it?
Flint62Smoothie replied to Flint62Smoothie's topic in Tanegashima / Teppo / Hinawajū
Last photo … but I can take more as advised …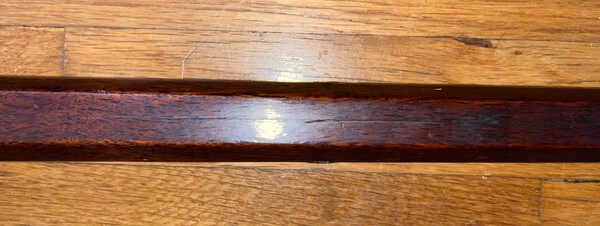
-
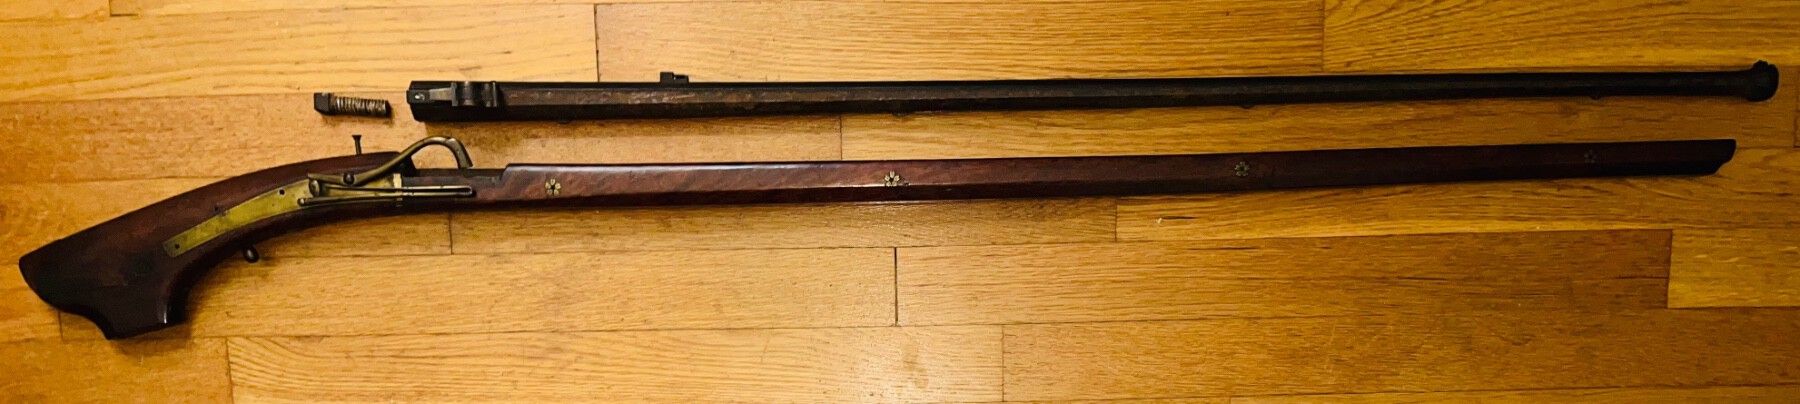
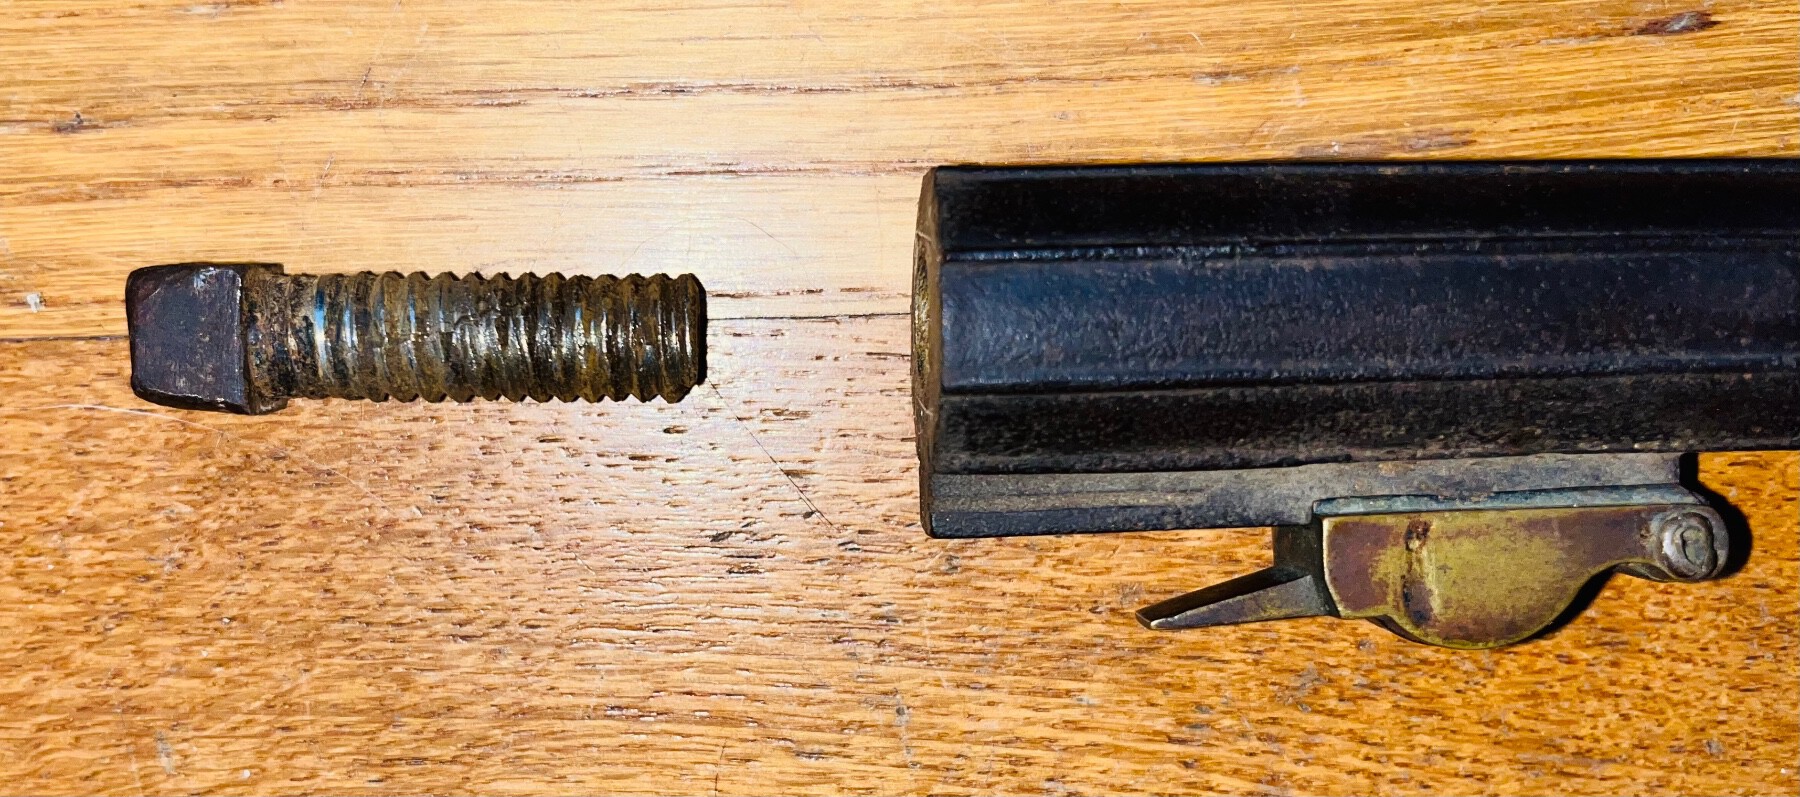
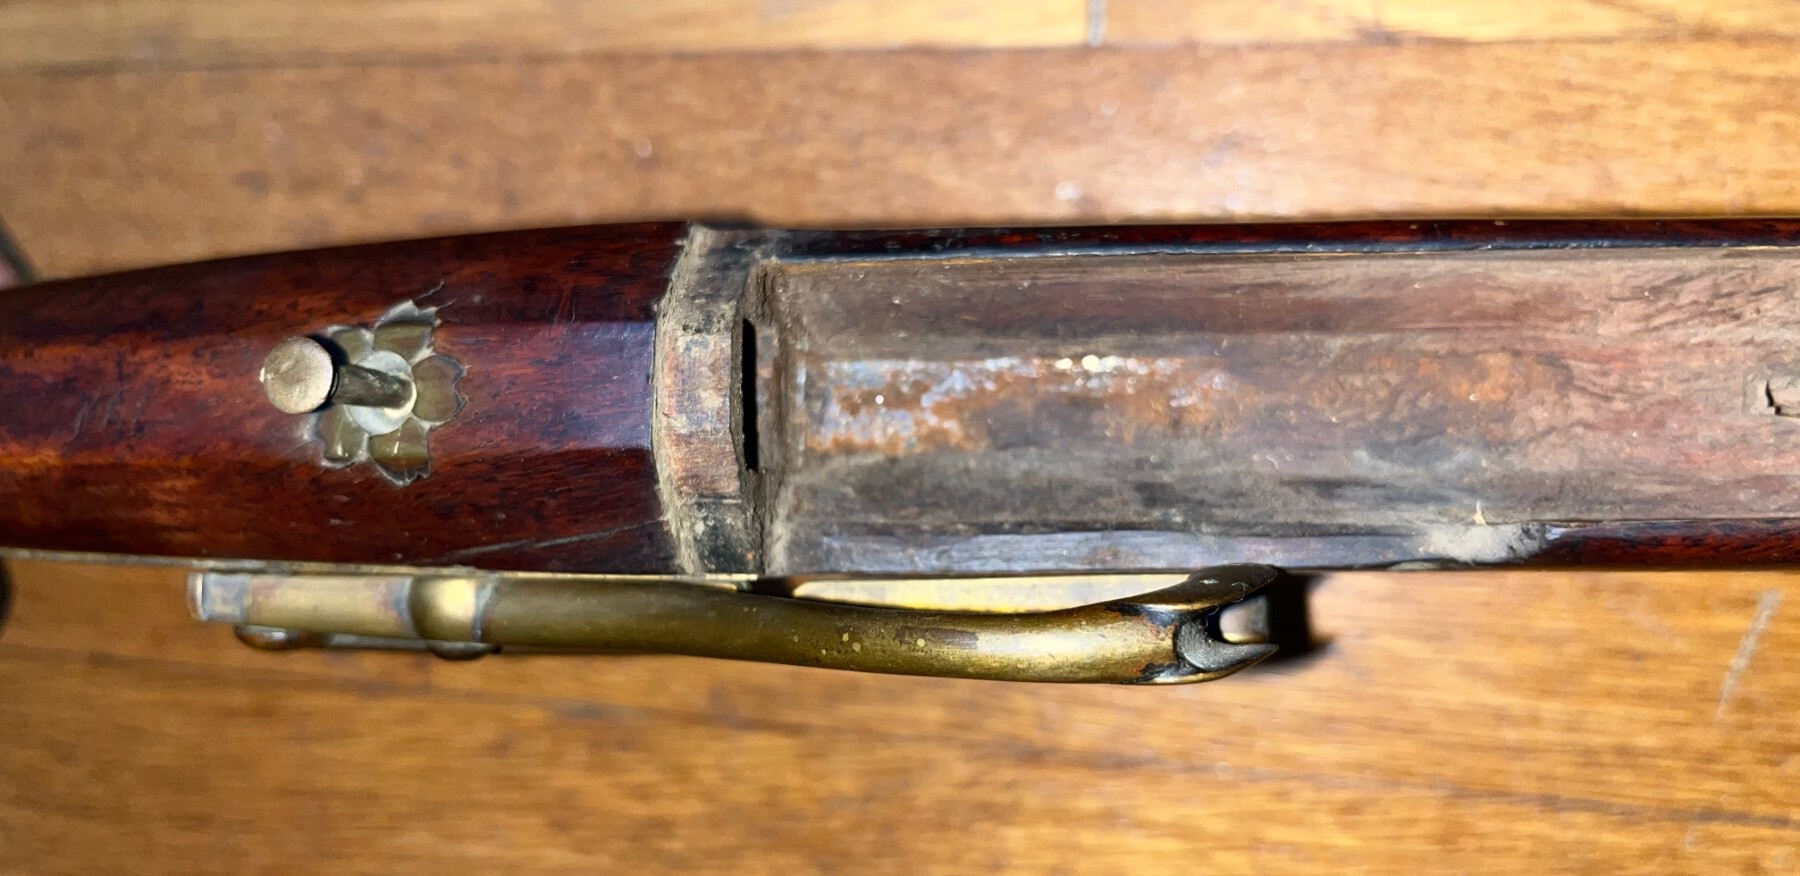
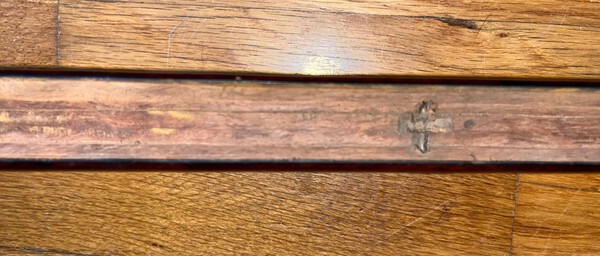
Just came in … Fully functional, but just missing the Trigger Guard & 2 pins and 1 pin that holds the main spring. The breech plug came right out! The bore will need refreshing. Most interesting and curious, in no particular order: -Appears to be sub-40 caliber, of 39” barrel -No Japanese markings -The large cross-pin securing the serpentine is locked in place by a pin down through the top, behind the tang -No ‘through hole’ to hold cord -Barrel is RIBBED the entire length, on the top-most octagonal facets -Stock shows a line on the bottom, below the ramrod hole, but it is not cut through -Inletting in barrel channel appears different that my other Tangs, with the slot cut below the ramrod hole, but what stands out is the deep scores for the bottom barrel flat Any ideas?


-
Rust Removal: Link = http://www.big45.com/ If you haven't ever used these...try them. They do work phenomenal! I once had a Colt Python that I bought after it went through a fire, so the blued finish was 'fleckeled' on the sideplate. This B45 metal pad removed all traces of the flecks/rust wthout harming any of the original blue finish. It is incedible for use in bores and on old guns and muzzleloaders. NOTE I've not tried it on an origial Tanegashima yet though ... FYI, steel wool WILL SCRATCH and damage a barrel and/or remove the finish! These 'Big 45' pads won't do either, as they are a proprieitary blend of Monel, which is harder than rust, but softer than steel.
-
What can one do to HELP move this along to publishing?????? It's possible I could asist with upfront $$. I also have done considerable Tect Writing for the Biotech field, if I can be of any further help with basic formtatting and proof-reading ... although clearly my knowledge of Japanese terms is NON-existant without Google Translator, LOL!
-
N I C E !
-
FWIW the best penetrating solution one can use is a DIY homemade mix of 50% acetone and 50% automatic transmission fluid (ATF). Years ago “Machinist Workshop Magazine” did a test on penetrating oils. Using nuts and bolts that they 'scientifically rusted’ to a uniform degree by soaking in salt water, they then tested the break-out torque required to loosen the nuts. They treated the nuts with a variety of penetrants and measured the torque required to loosen them. This is what they came up with: Nothing: 516 lbs WD-40: 238 lbs PB Blaster: 214 lbs Liquid Wrench: 127 lbs Kano Kroil: 106 lbs (ATF)/Acetone mix (50/50 mix): Only 50 lbs!
-
No, I meant I've ALWAYS been able to get the breech plug out on any BP arm I arm, original or replica, less those like a Toradar where they were forge-welded in place. Please show me a close up picture of the end of your breech plug and I may see the answer for you! ----------------------------------------------------------------------- Now, besides a 'heat hammer' (torch) that alwys helps loosen parts (it is the heating AND cooling cycle that does it, so immediately plunge the hot part into cold/ice water bath) FWIW the best penetrating oil one can use is a DIY homemade mix of 50% acetone and 50% automatic transmission fluid (ATF). Years ago “Machinist Workshop Magazine” did a test on penetrating oils. Using nuts and bolts that they 'scientifically rusted’ to a uniform degree by soaking in salt water, they then tested the break-out torque required to loosen the nuts. They treated the nuts with a variety of penetrants and measured the torque required to loosen them. This is what they came up with: Nothing: 516 lbs WD-40: 238 lbs PB Blaster: 214 lbs Liquid Wrench: 127 lbs Kano Kroil: 106 lbs (ATF)/Acetone mix (50/50 mix): Only 50 lbs!
-
I've never not been able to get one out. Great job on your pin and other rebuild efforts!
-
Maybe, but the pin is not solid, but it actually hollow ... more like a rivet, so that a 'rain umbrella' - not unlike those served in fancy drinks at Chinese/Polynesian restaurants - can be set into the top hole.
-
Unusual serpentine inlay
Flint62Smoothie replied to Bugyotsuji's topic in Tanegashima / Teppo / Hinawajū
I fully realize this ornate serpentine is off one of the non-firing replicas made by the Denix Company, but the Europeans did decorate their serpentines to look like a dragon’s head. Is there any evidence the Japanese made them more ornate like this?
-
Oh, that's good to know then, thanks. And yes, I bought that other one, but haven't read it yet. Many thanks!
-
Your book sounds fascinating! And thanks for the ‘heads up’ in interpreting the others.
-
Thank you! I just bought the Perrin book and am on the 'lookout' for the Taira book. I've done a TON of proofreading in my career if I may be of any asssitance on the book effort. You are a wealth of information here and very responsive, and I greatly appreciate both of those traits! Cheers!
-
@Bugyotsuji - Thank you for your response! Please let me know if you find anything. I am presently making a forge and have a computer-controlled heat trating oven. When I retire next JAN 2026, I plan to start making wheellocks, but as left-handed ones. Right now I am focusing on making 'replacement' V-spring mainsprings for the flintlocks in my collection, to aid in my knowledge of the spring making process. Some day I will forge myself a serpentine for my Tang if i don't find any parts in the mean time. Cheers! Dale
-
Hey all: I guess I am lucky enough to have an English version of his Book 1, acknowledging that there are eiting errors as a few have pointed out here. But has any other English speaker purchased his 2nd book and have any comments regarding its value? Thanks in advance! Dale