Fabian23
-
Posts
28 -
Joined
-
Last visited
Content Type
Profiles
Forums
Events
Store
Downloads
Gallery
Everything posted by Fabian23
-
Many thanks! From the pictures it seems I maybe missunderstood the method of double wrapping? I thought the core layer was also a strip of coiled metal but from the photos and pictures the core layer seems to be a sheet rolled into a tube around the mandrel, and then a spiral wrap around the core tube. I assume that in the case of a triple wrap barrel the second spiral wrap was applied with the opposite twist.
-
Hi! I'm looking for a needle in a haystack but perhaps someone else's haystack is neater than mine. When browsing through teppo related pictures online I came across an old drawing/print illustrating perfectly the double wrap technique for hammer forging the barrel. It was possibly a snippet from a manuscript. Secure in the knowledge that I would find it again I of course didn't save it. You can guess the rest Perhaps one of our esteemed members knows its possible whereabouts?
-
Need help identifying a teppo
Fabian23 replied to thisisadisplayname's topic in Tanegashima / Teppo / Hinawajū
The beauty of these matchlocks is that almost everything can be easily made without specialist tools. A pan cover can be made out of a chunk of brass, hand files and a lot of patience. I've made two now. -
Early Japanese firearm related images and information.
Fabian23 replied to estcrh's topic in Tanegashima / Teppo / Hinawajū
My question was rather, did the original Portuguese matchlocks also have cheek-piece butts or was that a Japanese adaptation? I can very much imaging that a european shoulder-butt was not well suited to Japanese armour and helmets of the time. -
Early Japanese firearm related images and information.
Fabian23 replied to estcrh's topic in Tanegashima / Teppo / Hinawajū
Thanks! I assume these were also "check-weld only" stocked rather than shot from the shoulder? I ask this because for example we see both in this excellent video from Prof. Németh The 265 early 16th century tinder lock firearms of Pilsen -
Early Japanese firearm related images and information.
Fabian23 replied to estcrh's topic in Tanegashima / Teppo / Hinawajū
Does anyone have an idea of what the first Portuguese matchlocks to enter Japan looked like? I'm trying to figure out how much the Japanese modified the ergonomics/general layout. I doubt any survived but maybe just maybe in a museum or temple somewhere? -
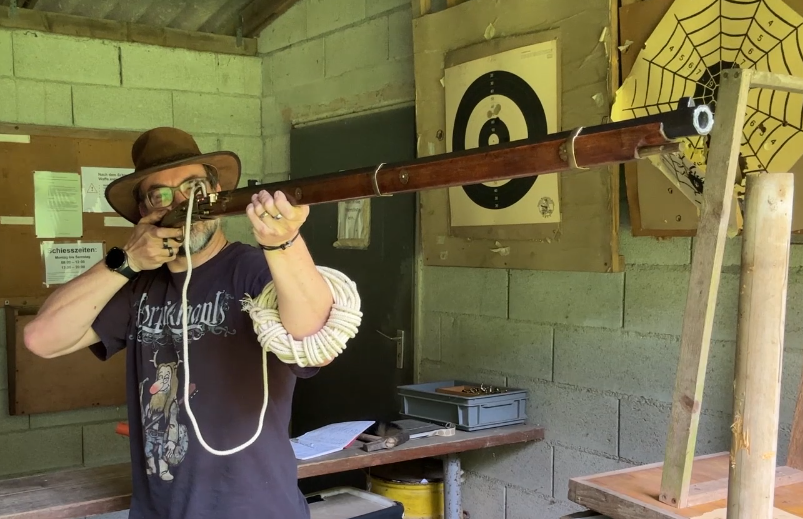
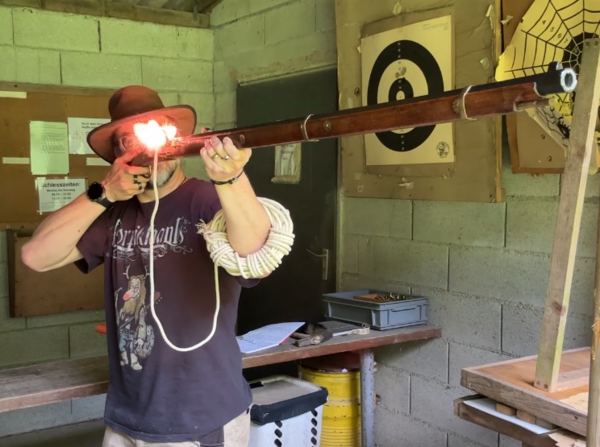
Took it to the 50m range today using what components I had at hand. .450" lead round ball Doubled up .34mm patches, the outer one greased. Guestimated load of 50gr Swiss 2 BP (FFFg) Once I figured out the average point of aim it was reasonably easy to hold the black. Certainly accurate enough to pick a specific target out of a crowd. Once the match is burning well the lock is very fast and reliable. Recoil is a short tug on the cheek, not painful at all. Next I shall seek out slightly larger musket balls so that I can just use one patch. The powder load seems about right for 50m and may switch to a coarser grain.


-
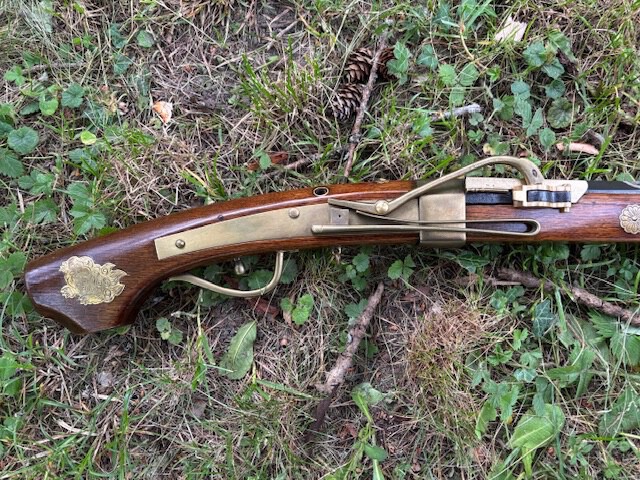
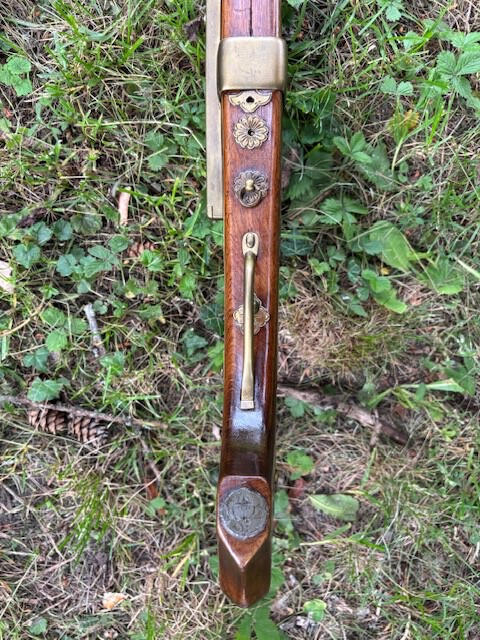
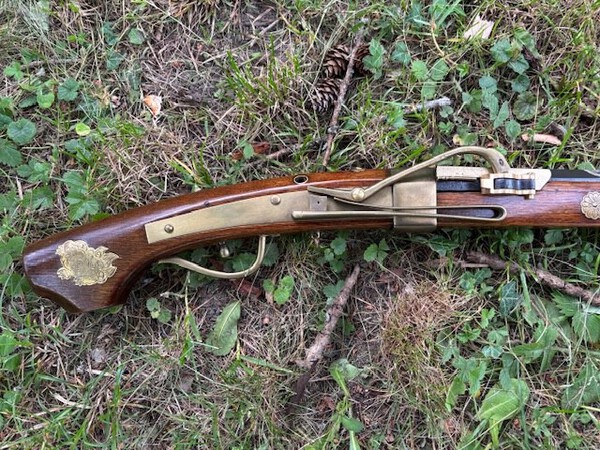
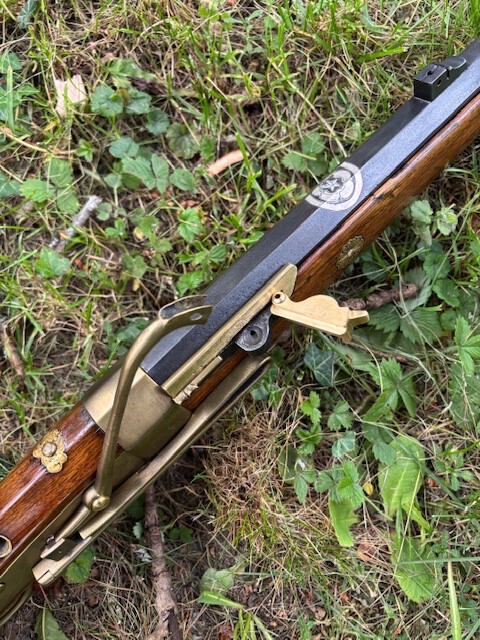
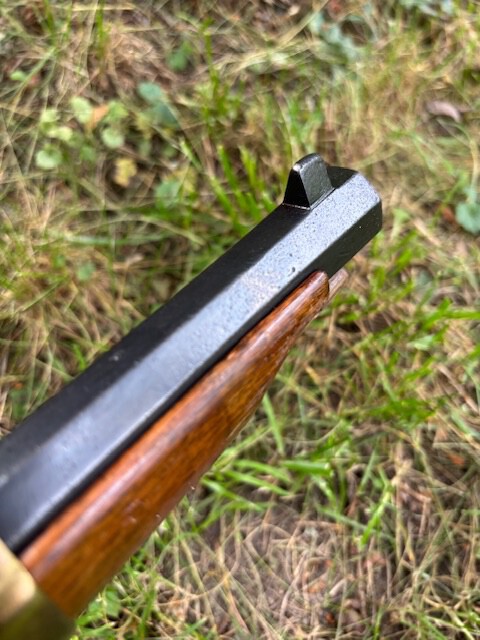
Folks, the project is 99.9% complete. I applied a few layers of cold blue to the barrel which has turned a very pleasing dark bluish grey, like a faded blue which fits the overall patina of the piece very well. During the process I discovered that there is a silver(?) bead on the rear of the front sight, which is a nice touch. The barrel is pinned with whittled down bamboo BBQ skewers. The lock is now also tuned to catch the cock safely and it snaps down gently but swiftly upon release. All I need to still do is source a new rod since the original snapped at some point and is missing about 3”. I may take a few shots with it eventually.

-
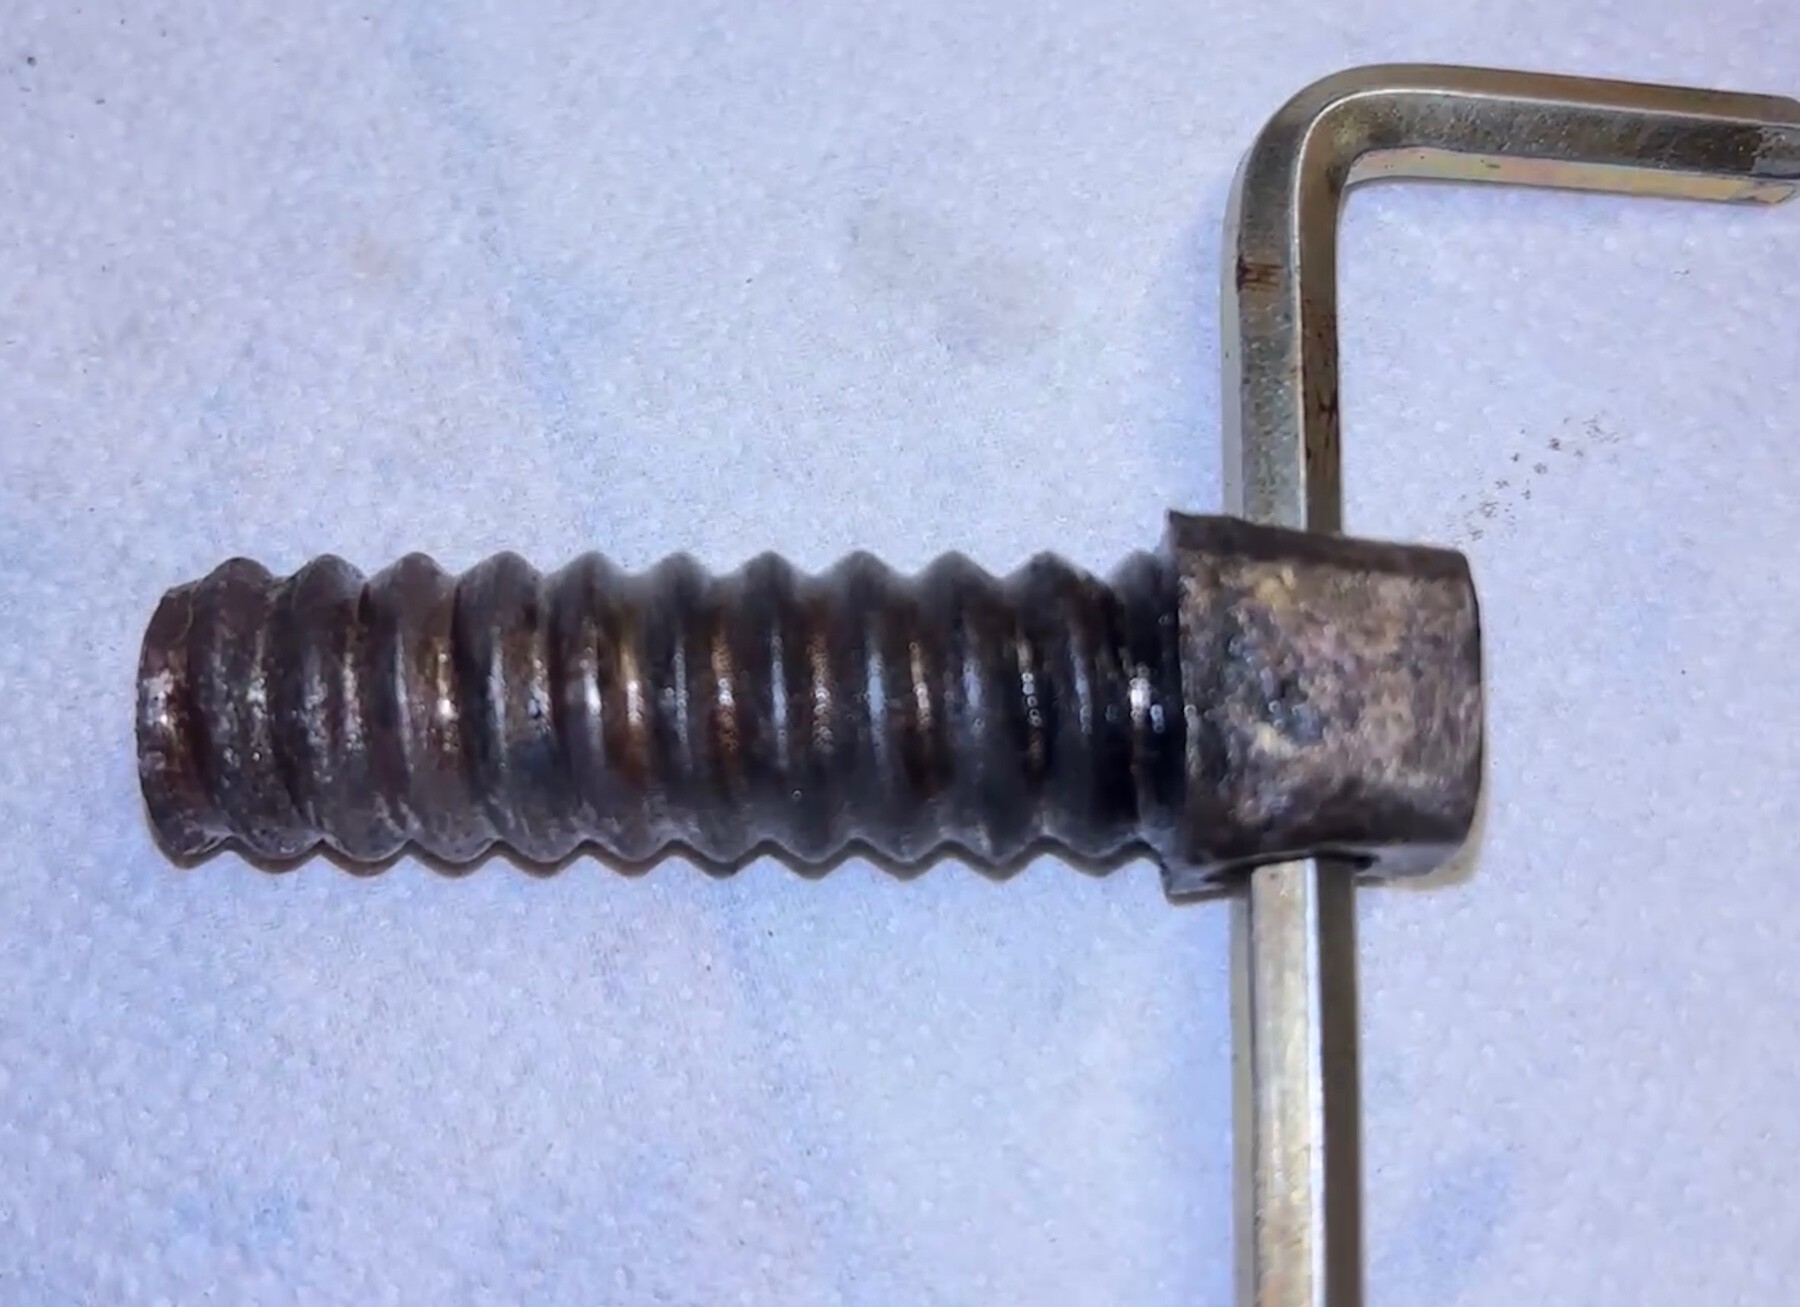
Cleaning and honing the barrel was been slow going so I decided to dare to attempt pulling the breech plug. With the barrel firmly clamped I gently heated the breech area with a blowtorch and pretty quickly some stinky black ooze started bubbling up around the edges of the plug. No idea what it was but it smelled like burning tyres and it didn’t catch fire in the flame of the torch, it just dried up. Using an adjustable spanner on the square while keeping the heat on the barrel I was quite quickly able to tease the plug out. It’s in remarkably good condition. The face is a bit pitted but that is easily cleaned up.

-
I described a few posts above how I made the pin 😉
-
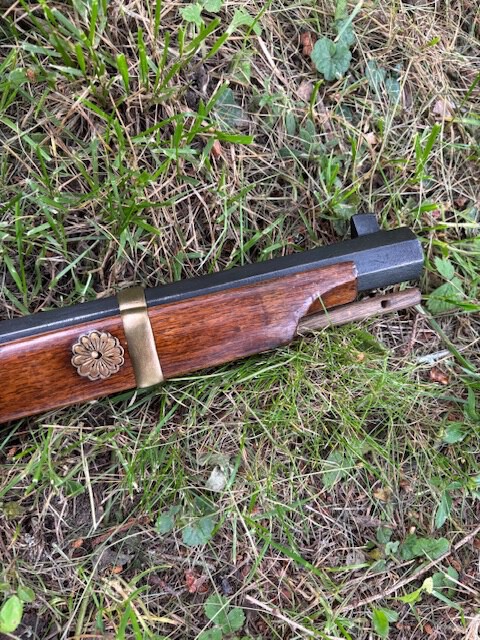
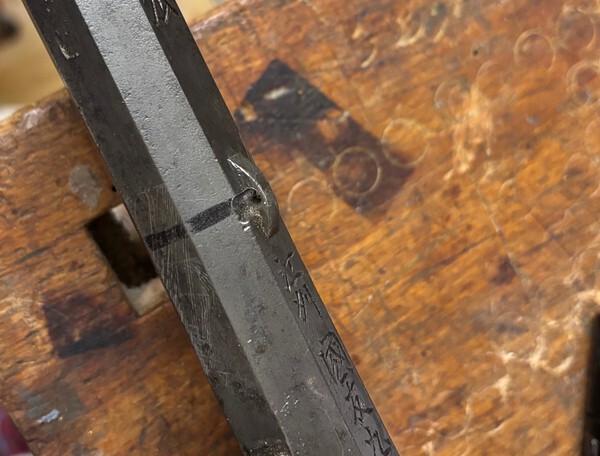
A quick update, next on the list was the 4 barrel lugs of which only one actually aligned properly with the stock holes, another factor which made me think it is a composite gun. The aligned one I left alone (1st pic). One of the others was partially detached so I could see that they were soldered into slots cut into the barrel. I therefore used the same method for the three new lugs in their proper positions. Now I need to finish honing out the bore and prep it for a reblue.

-
OK, thanks for the clear answer. My search continues. So far I have only seen anecdotal evidence on various muzzleloading forums saying it is possible but sadly I need more tangible proof. I suspect that most woods have been at least tried, even if later disguarded as unsuitable or superceded by better ones.
-
I have a question on a professional level unrelated to my Teppo. I work in patents and I am trying to prove that various woods have been used in the making of stocks for firearms. There is one which has eluded me for now and that is Mulberry and I know it was/is popular in Japan for cabinet making. Was it by any chance also used for making matchlock stocks? If so I would be very grateful for a documented and dated source (prior to 2024) confirming it.
-
Well I have to make it good enough that I can sell it as 100% original for a billion dollars when I retire
-
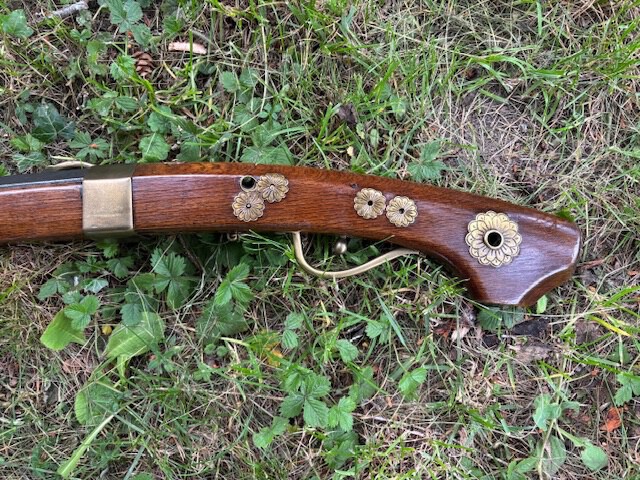
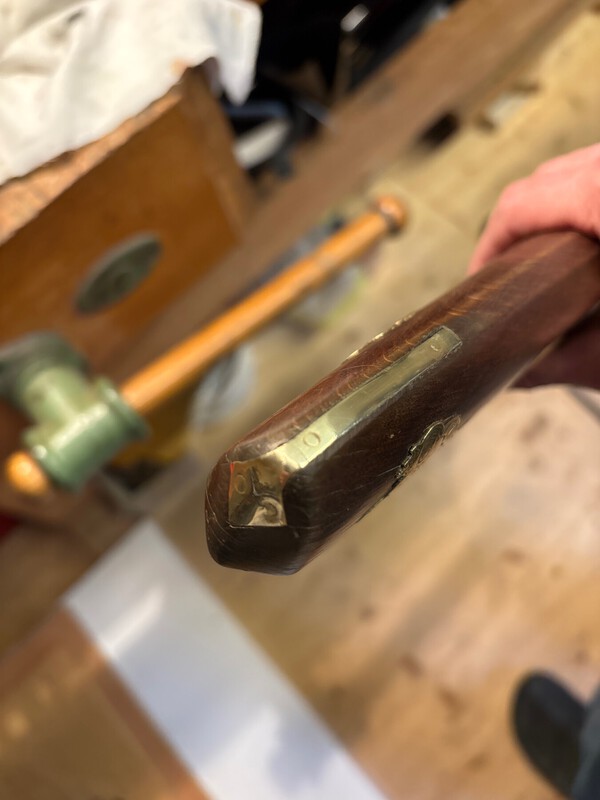
Stock cap finished and tacked in like the original. The fit is 99% there but I don’t think I can improve on it without a few decades of apprenticeship. Much harder than I thought it would be.
-
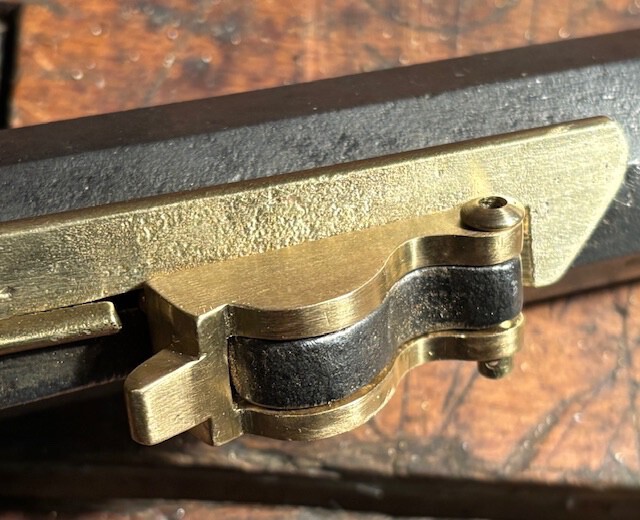
After much contemplation and trial and error I have finished off the axis pin. I first tried the rolling method using a piece of sheet brass taken off a brass 12g shotgun shell rolled around a 3mm drill bit, which worked but the brass was too thin, about 0.2mm. Instead I rummaged around my bits boxes and found a 4mm brass tube with 0,5mm wall thickness - perfect! I cut a 3cm section, slit it down one side, annealed with a short blast of the blowtorch it to make it pliable and then gently hammered it on the 3mm drill bit to make the sides of the slit meet. The diameter was still slightly too big for the hole in the pan so I used the hole itself as a die to size the brass tube down to the right diameter by tapping it through. On the lathe I cut down a piece of bar stock to form the axis pin head, inserted the brass tube and soldered it in. All that remained was shaping the head with hand files and fine grit paper, drilling the cross hole for the wire and trimming the pin to length. 😊 Ammonia patination next and then it’s making a new stock cap 💪


-
This is truly a wonderful forum thank you 🙏
-
If anyone can clarify the construction of the axis pin I would be very grateful
-
One more reason to have little paper cocktail umbrellas at home
-
Interesting, I’ve been looking for clues online as to its composition. I had assumed it was a solid hollow pin with a head. I have seen some also with a cross hole just under the lower surface of the pan. I’m not too fussy about originality but if it’s easy to make it the original way then why not.
-
Thanks! I have proceeded in very small steps every day, planning ahead what cuts to make and how, to ensure I don’t mess up. One turn of the handle the wrong way on the mill and it’s back to zero. Drilling the pin hole required making a simple sacrificial jig which then served as a guide for drilling the real piece. Now it is indeed just a case of finishing a bit of shaping by hand, smoothing the edges and patinating. The axis pin will be a quick lathe job.
-
Almost there

-
Update 2: Most critical phase, drilling the axis pin hole, is done. If I had messed it up I would have had to start all over again. Now it’s lots of shaping and filing.

-
The amount of tweeking needed to finish the lock off properly and the difference in mon on the lock and stock made me question the homogeneity of the piece. Glad to find out here that it appears authentic 😊
-
Work in progress. Last time I did this I did it all by hand. A mill makes it much easier.